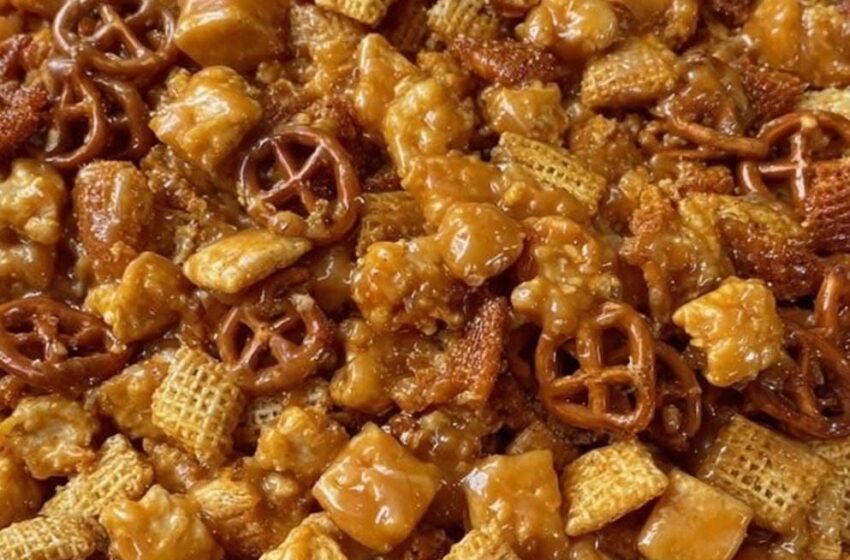
If you want a snack that perfectly balances the irresistible combination of sweet and salty, this Caramel Corn Snack Mix is a delicious option. Fluffy popcorn, crunchy mini pretzels, and roasted nuts are tossed together and completely coated in a rich, buttery, homemade caramel sauce, then baked low and slow until perfectly crisp.
It’s surprisingly fun to prepare, packed with incredible textures, and perfect for movie nights, autumn bonfires, or packaging up into decorative tins for holiday gifting. The recipe is designed around a simple, foolproof caramel making method that doesn’t require a candy thermometer, yielding a bakery-quality snack mix that stays deliciously crunchy for weeks.
Why You’ll Love This Recipe
- The ultimate sweet and salty flavor profile
- Stays perfectly crisp and fresh for weeks
- Makes a massive batch perfect for feeding a crowd
- An incredibly popular homemade holiday gift
- No candy thermometer required
- Cheaper and far more delicious than store-bought gourmet popcorn
- Easy to customize with your favorite nuts or candies
- Bakes hands-free in the oven (just requires occasional stirring)
- The baking soda trick creates a light, delicate crunch that won’t break your teeth
Ingredients
For the Dry Snack Mix
- 10 cups popped popcorn (plain or lightly salted, all unpopped kernels carefully removed)
- 3 cups mini pretzel twists or pretzel sticks
- 2 cups roasted pecans, peanuts, or mixed nuts
- 2 cups crispy corn square cereal (like Corn Chex)
For the Caramel Coating
- 1 cup (2 sticks) unsalted butter
- 2 cups light brown sugar, packed
- ½ cup light corn syrup
- 1 teaspoon salt
- 1 teaspoon pure vanilla extract
- ½ teaspoon baking soda
Optional Additions
- 1 cup M&Ms or Reese’s Pieces (tossed in after the mix is completely cooled)
- A heavy drizzle of melted semi-sweet chocolate over the cooled mix
- A sprinkle of flaky sea salt right before baking
- 1 teaspoon of cinnamon mixed into the caramel for a spiced autumn flavor
Using light corn syrup in the caramel is essential—it prevents the brown sugar from crystallizing, ensuring your coating is smooth, glossy, and perfectly crisp rather than gritty.
Instructions
Step 1: Prepare the Oven and the Dry Mix Preheat your oven to 250°F (120°C). Line two large, rimmed baking sheets with parchment paper or silicone baking mats. In a massive mixing bowl (or a clean, large roasting pan), combine the popped popcorn, mini pretzels, roasted nuts, and corn cereal. Toss gently to combine. Crucial step: Double-check that absolutely no unpopped popcorn kernels made it into the bowl!
Step 2: Boil the Caramel In a medium, heavy-bottomed saucepan, melt the butter over medium heat. Stir in the brown sugar, corn syrup, and salt. Bring the mixture to a rolling boil, stirring constantly. Once it begins to boil across the entire surface, stop stirring and let it boil undisturbed for exactly 4 minutes.
Step 3: Add the Baking Soda Remove the saucepan from the heat immediately. Carefully stir in the vanilla extract and the baking soda. The mixture will immediately lighten in color and foam up significantly—this is exactly what you want! The baking soda aerates the caramel, making it tender and crunchy rather than hard and sticky.
Step 4: Coat the Mix Working quickly while the caramel is hot and foamy, pour it slowly over the dry snack mix in your large bowl. Use a large rubber spatula or wooden spoon to gently fold the mixture, tossing from the bottom up until the popcorn and pretzels are as evenly coated as possible. (Don’t worry if it isn’t perfect; it will coat more evenly as it melts in the oven).
Step 5: Bake and Toss Divide the sticky mixture evenly between your two prepared baking sheets, spreading it out. Bake for 45–60 minutes. Every 15 minutes, remove the pans from the oven and give the mix a very good stir, rotating the pans when you put them back. This drying process is what gives the caramel corn its signature crunch.
Step 6: Cool and Break Apart Remove the pans from the oven and let the snack mix cool completely on the baking sheets (about 1 hour). As it cools, the caramel will harden into a crisp shell. Once entirely cool, use your hands to break the mixture apart into clusters. Toss in any candies or chocolate drizzles at this stage, if using.
Tips for the Best Caramel Corn Snack Mix
- Weed out the kernels Biting into a hard, unpopped popcorn kernel hidden inside a cluster of caramel is a quick way to ruin a great snack. Sift through your popped corn very carefully before making the mix.
- Use a silicone spatula Hot caramel sticks to everything, but it slides right off silicone. A large silicone spatula is your best friend when tossing the mix.
- Don’t skip the baking soda This is the most important ingredient in the recipe! Without it, your caramel will dry into a rock-hard candy coating that is very difficult to chew.
- Bake low and slow The low 250°F oven temperature dries out the caramel without burning the sugar or the popcorn. Do not try to rush this step by raising the heat.
Delicious Variations
- Chocolate Drizzled Caramel Corn Once the mix is completely cooled and broken into clusters, melt ½ cup of dark chocolate and ½ cup of white chocolate. Drizzle both heavily over the mix and let it set.
- Spicy Southwest Caramel Corn Add ½ teaspoon of cayenne pepper and 1 teaspoon of smoked paprika to the hot caramel right before pouring it over the popcorn for a sweet, smoky, and spicy kick.
- Peanut Butter Caramel Corn Stir ½ cup of creamy peanut butter into the hot caramel right after you take it off the stove, then proceed with the recipe as directed.
What to Serve With Caramel Corn Snack Mix
This sweet and crunchy mix is the ultimate standalone snack, but it pairs wonderfully with:
- A hot mug of spiced apple cider or hot chocolate
- A cold glass of milk
- A festive holiday dessert board alongside cookies and fudge
- Your favorite movie night spread
For a fantastic party favor or hostess gift, scoop the cooled clusters into clear cellophane bags, tie them with a festive ribbon, and attach a small handwritten recipe card.
Make-Ahead Instructions
This recipe is brilliant for advanced preparation because its shelf life is so impressive. You can make the entire batch of Caramel Corn Snack Mix up to two weeks before you plan to serve or gift it, provided you store it correctly.
Storage
Store the fully cooled and broken-apart snack mix in large, airtight containers or heavy-duty zip-top bags at room temperature for up to 2 weeks. Keep it away from heat and humidity, which will cause the caramel to become soft and sticky. Freezing is not recommended, as condensation during the thawing process will ruin the crisp texture.
Frequently Asked Questions
Can I use microwave popcorn? It is not recommended. Microwave popcorn is heavily coated in artificial butter flavoring, oils, and excess salt, which will interfere with the caramel adhering properly and can make the mix greasy. Air-popped or plain stovetop-popped corn is best.
Why is my caramel corn chewy instead of crunchy? Chewy caramel corn usually means it wasn’t baked long enough to dry out, or the oven temperature wasn’t quite accurate. If your mix is chewy after cooling, pop it back into a 250°F oven for another 15-20 minutes, then let it cool completely again.
Can I use a different type of cereal? Absolutely. Any sturdy, unsweetened cereal works beautifully. Rice squares, wheat squares, or even plain Cheerios are fantastic substitutes for the corn squares.
Perfect for Gifting and Gatherings
One of the best things about this recipe is its impressive yield and stunning presentation. It makes a massive amount of gourmet-quality snack mix for a fraction of the price of boutique popcorn tins. It’s the ultimate edible gift for teachers, neighbors, and coworkers during the holidays, and it looks beautiful piled high in a large serving bowl at a casual get-together.
Final Thoughts
Caramel Corn Snack Mix is proof that making homemade candy coatings is nothing to be intimidated by. Fluffy popcorn, salty pretzels, crunchy nuts, and a rich, buttery caramel come together to create a snack that is dangerously addictive. Serve it at your next movie night, pack it into decorative tins for the holidays, or keep a stash in the pantry for when a sweet craving strikes. It’s crispy, sweet, salty, and wonderfully fun to make—a timeless recipe you’ll definitely want to keep in your permanent snack rotation.

